Pages

Search

Saturday, December 17, 2011

How to Install Simulator and Cod File in BlackBerry?


Downloading and Installing the BlackBerry Simulator
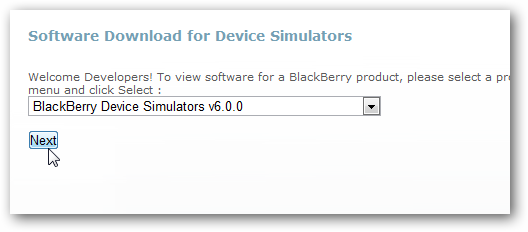
First, you’ll need to download and install the BlackBerry Simulator.You download from this URL.   Head over to the download page (link below), select the version of BlackBerry OS you want to try, and click Next.  We’re going to select v6.0.0, which is the latest version that will ship on the BlackBerry Torch.
image
You’ll need to register for the download, so enter your name and other info.
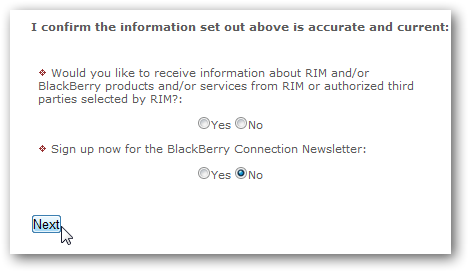
When you’re done, confirm that your information is correct, select whether or not you want to receive emails from RIM or BlackBerry, and click Next.
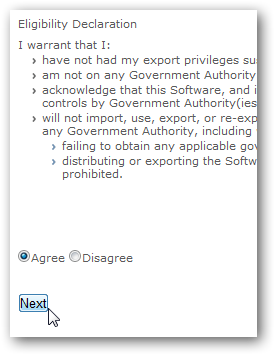
Agree to the license, and click Next.
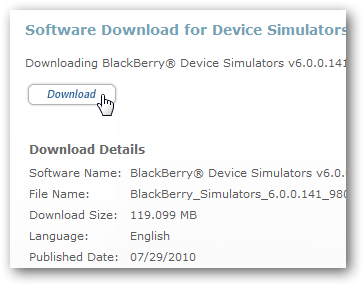
Finally, click the Download link to download the simulator software.
Once the download is finished, run the installer.  Your computer may need to install some extra dependencies, so simply click Next to continue and install them automatically.

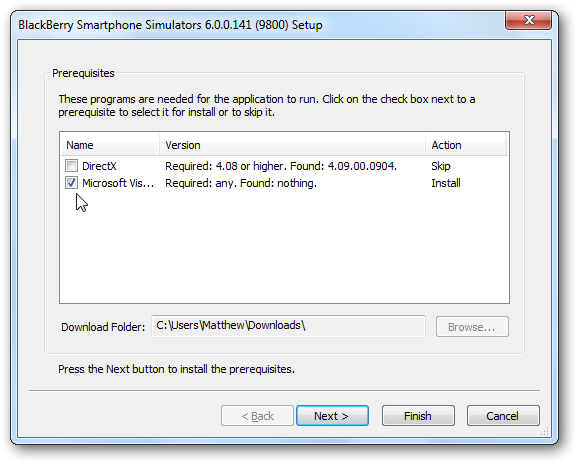
Once the prerequisites are installed, you’ll see the standard BlackBerry Simulator installer; click Next and setup as normal.
Once it’s installed, you’ll be ready to run your new virtual BlackBerry device from the start menu.
Using the BlackBerry Simulator
When you first run the Simulator, you may need to add an exception for it to your Firewall.  Windows Firewall will ask you to allow it to access your home networks, so just click Allow Access to let it have access to the internet.
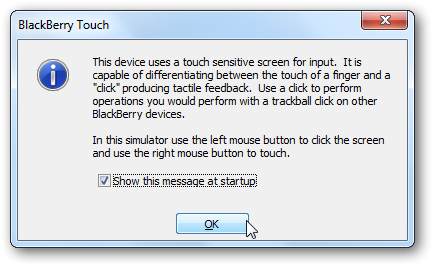
You’ll also be prompted by the simulator with info about using the virtual touch screen on the simulator.
Now you’ll see a virtual BlackBerry on your desktop, booting the latest version of BlackBerry OS.
The simulator may be larger than your screen, so you may have to scroll down to see all of the virtual device.  You can change the zoom on the device from the View menu if you’d like.
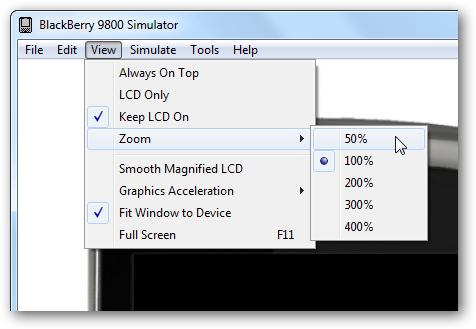
Here’s the simulator at 50% zoom, so now we can see it all at once.
Install Apps Manually
If you have a BlackBerry app you’ve downloaded directly from the internet, you can install it in the emulator as well.  Click Load BlackBerry Application in the File menu to open the application.

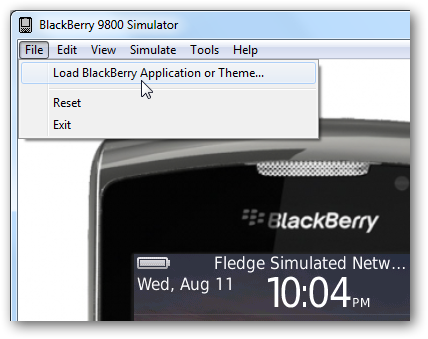
Select the *.cod file you’ve downloaded in the Explorer window that opens.

Monday, December 12, 2011

How to install additional languages on your BlackBerry smartphone?


To install another language to your BlackBerry smartphone, you will need BlackBerry® Desktop Software installed on your PC. From the computer with your desktop software installed, download and install the software bundle that contains the language that you wish to add to your device. Once the software bundle has been installed, the language bundles that are available for your device will depend on the wireless service provider.

How to install and configure additional language packs on a BlackBerry smartphone

  1. From the BlackBerry Desktop Software website, download the BlackBerry® Device Software for the BlackBerry smartphone that includes the language pack you want. For example, BlackBerry Device Software v5.0.0.1014 (All Languages – East Asia languages included)
  2. Open BlackBerry Desktop Manager.
  3. Select the application loader tool.
  4. Open Add/Remove Programs. At this point, BlackBerry Desktop Manager will confirm if the installed version of BlackBerry Device Software version is specific to the wireless service provider that the BlackBerry smartphone was purchased from.
  5. From the Device Application Select screen, locate East Asian Language and Input Support.
  6. Select the language you want to install.
  7. Click Next. The installation will begin.
Once the BlackBerry Device Software is installed on the BlackBerry smartphone, complete the following:
  1. Go to Options.
  2. Under Input Language, select the language that was installed.
  3. Save your changes.
  4. Compose an email message to test the input language.

Note :- For more information on installing BlackBerry Desktop Software, see How to install the BlackBerry Desktop Software for Microsoft Windows.


Friday, December 9, 2011

How to Install Application to use the Desktop Manger .

First you download Desktop Manger for this link


Then follow below step .

Step 1

Connect your BlackBerry to your computer via the USB cable that came with it, or any USB cable that fits.
Start the Dekstop Manager.

Step 2

You have a few choices to select from here.
Click on Application Loader/Application.

Step 3

You should now see something like what you see above.
From this screen, click browse.

Step 4

After finding the alx file for the application, highlight it and click open.

Step 5

From here you should  now listed of Install Application the Action column.
Click Apply.

Step 6

You’re done!
You can now exit the Dekstop Manager and disconnect your BlackBerry.

Wednesday, December 7, 2011

BlackBerry Push Notification Server Code in J2SE

Hello,
       
           In BlackBerry Push Notification three type entity use.

1.Server
2.Mobile
3.BIS

Here i clarify the Server Code.


import java.io.BufferedReader;
import java.io.DataOutputStream;
import java.io.InputStreamReader;
import java.net.URL;
import java.text.SimpleDateFormat;
import java.util.Date;
import java.util.TimeZone;
import java.util.Vector;
import javax.net.ssl.HttpsURLConnection;


public class Pusher {
private static String _appid = "xxx-xxxxxxxxxxxxxxxx";
private static String _spacers = "mPsbVQo0a68eIL3OAxnm";
private static String _auth = "Basic <base64token>"; // Replace <base64token> with your userid:password encode, http://bit.ly/diYQUr enter APPID:PASS and encode
private static String _pushurl = "https://pushapi.eval.blackberry.com/mss/PD_pushRequest";
private static String _uagent = "Hallgren Networks BB Push Server/1.0";
private static boolean _output = false;

public static boolean pushMessage(Vector<String> pins, String msg) {
if (pins.isEmpty())
return false;
if (msg.equals(""))
return false;

String pushid = "" + System.currentTimeMillis();
String delivebefore = getDeliveryTime();
StringBuffer dataToSend = new StringBuffer();
dataToSend.append("--" + _spacers + "\r\n");
dataToSend.append("Content-Type: application/xml; charset=UTF-8\r\n\r\n");
dataToSend.append("<?xml version=\"1.0\"?>\r\n");
dataToSend.append("<!DOCTYPE pap PUBLIC \"-//WAPFORUM//DTD PAP 2.1//EN\" \"http://www.openmobilealliance.org/tech/DTD/pap_2.1.dtd\">\r\n");
dataToSend.append("<pap>\r\n");
dataToSend.append("<push-message push-id=\"" + pushid + "\" ");
dataToSend.append("deliver-before-timestamp=\"" + delivebefore + "\" ");
dataToSend.append("source-reference=\"" + _appid + "\">");
for (int i = 0; i < pins.size(); ++i)
dataToSend.append("<address address-value=\"" + pins.elementAt(i) + "\"/>");
dataToSend.append("<quality-of-service delivery-method=\"unconfirmed\"/>\r\n");
dataToSend.append("</push-message>\r\n");
dataToSend.append("</pap>\r\n");
dataToSend.append("--" + _spacers + "\r\n");
dataToSend.append("Content-Type: text/plain\r\n");
dataToSend.append("Push-Message-ID: " + pushid + "\r\n");
dataToSend.append("\r\n");
dataToSend.append(msg + "\r\n");
dataToSend.append("--" + _spacers + "--");
printer("-------------------------------------------------------------------");
printer(dataToSend.toString());
printer("-------------------------------------------------------------------");

URL url;
HttpsURLConnection connection = null;
try {
url = new URL(_pushurl);
connection = (HttpsURLConnection) url.openConnection();
connection.setRequestMethod("POST");
connection.setRequestProperty("Content-Type", "multipart/related; boundary=" + _spacers + "; type=application/xml");
connection.setRequestProperty("User-Agent", _uagent);
connection.setRequestProperty("Authorization", _auth);
connection.setDoInput(true);
connection.setDoOutput(true);

DataOutputStream wr = new DataOutputStream(connection.getOutputStream());
wr.writeBytes(dataToSend.toString());
wr.flush();
wr.close();
BufferedReader rd = new BufferedReader(new InputStreamReader(connection.getInputStream()));
StringBuilder sb = new StringBuilder();
String line = null;
while ((line = rd.readLine()) != null) {
sb.append(line + '\n');
}
printer(connection.getResponseCode() + " | " + connection.getResponseMessage());
printer(sb.toString());
if (sb.toString().contains("code=\"1001\""))
return true;
return false;
} catch (Exception e) {
printer(e.getMessage());
return false;
} finally {
if (connection != null) {
connection.disconnect();
}
}

}

public static String getDeliveryTime() {
Date now = new Date(System.currentTimeMillis() + 300000);
SimpleDateFormat d = new SimpleDateFormat("yyyy-MM-dd'T'HH:mm:ss'Z'");
d.setTimeZone(TimeZone.getTimeZone("GMT"));
return d.format(now);
}

private static void printer(Object response) {
if (_output)
System.out.println(response);
}
/*
public static void main(String[] args) {
Vector<String> v = new Vector<String>();
v.add("12345678");
if (pushMessage(v, "message"))
System.out.println("Sent Ok");
else {
System.out.println("Returned False");
}
/////////////////////////// Or send to all
Vector<String> v1 = new Vector<String>();
v1.add("push_all");
if (pushMessage(v, "message"))
System.out.println("Sent Ok");
else {
System.out.println("Returned False");
}

}
*/
}

How get Device Pin Number?

Hello,

     In BlackBerry we get all device info to Use the DeviceInfo api but  there are some problem when we get the PIN number means PIN number get into Int so those pin number convert into Hexadecimal so check this code.


int pin = DeviceInfo.getDeviceId();  
String pinNumber = Integer.toHexString(pin); 

Tuesday, December 6, 2011

How to Know if Map are install or not by Programmatically?

Below Point are mention  it


// OS 4.5 - 5.0


int mh1 = CodeModuleManager.getModuleHandle("net_rim_bb_lbs"); 
// OS 6.0
int mh2 = CodeModuleManager.getModuleHandle("net_rim_bb_maps"); if (mh1 == 0 && mh2 == 0) { Dialog.alert("BlackBerry Maps not installed"); }